import os
from glob import glob # extract path of each file
import pandas as pd # data preprocessing
from xml.etree import ElementTree as et # parse information from XML
from functools import reduce

import warnings
warnings.filterwarnings('ignore')Extract Object from XML
In the event this step is necessary and we are not using a model that already accounts for such a process, here is a quick recap of how to do it
Install Packages
.
List Files
# step-1: get path of each xml file
xmlfiles = glob('./data_images/*.xml')
# replace \\ with /
replace_text = lambda x: x.replace('\\','/')
xmlfiles = list(map(replace_text,xmlfiles))
xmlfiles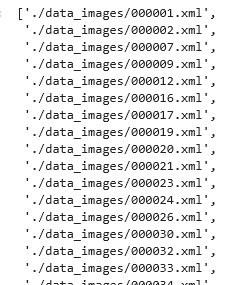
Extract Filename from XML
- We did this using R in the past, let’s do it with Python
- Create a function
# step-2: read xml files
# from each xml file we need to extract
# filename, size(width, height), object(name, xmin, xmax, ymin, ymax)
def extract_text(filename):
    tree = et.parse(filename)
    root = tree.getroot()

    # extract filename
    image_name = root.find('filename').text
    # width and height of the image
    width = root.find('size').find('width').text
    height = root.find('size').find('height').text
    objs = root.findall('object')
    parser = []
    for obj in objs:
        name = obj.find('name').text
        bndbox = obj.find('bndbox')
        xmin = bndbox.find('xmin').text
        xmax = bndbox.find('xmax').text
        ymin = bndbox.find('ymin').text
        ymax = bndbox.find('ymax').text
        parser.append([image_name, width, height, name,xmin,xmax,ymin,ymax])

    return parser
# call the function
parser_all = list(map(extract_text, xmlfiles))
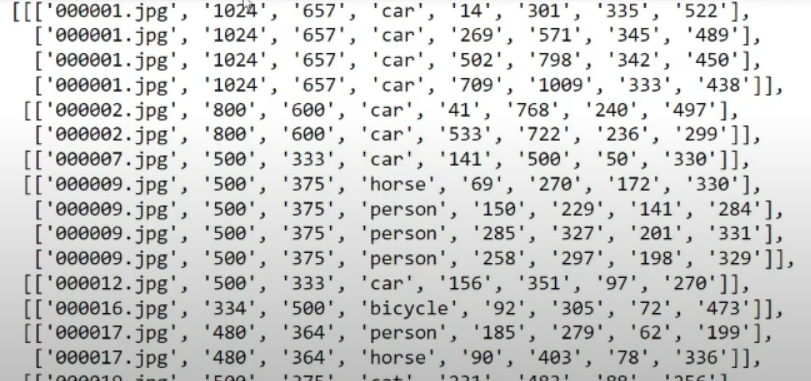
- As you see above you have the file name, width, height, name of object (label), xmin…..
- Note that you will have one for each filename, in the case above all that information is for 00001.jpg, so you will have as many lists as you have files in the directory
Reduce
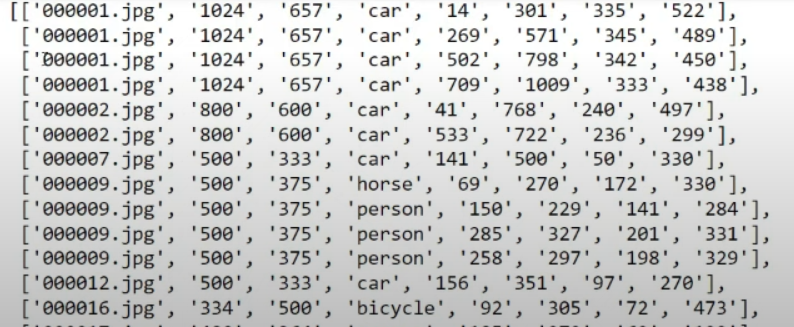
- We need to put all the lists together
- Here is what it looks like after we use reduce() function below
data = reduce(lambda x, y : x+y,parser_all)
# transform it to a df
df = pd.DataFrame(data,columns = ['filename','width','height','name','xmin','xmax','ymin','ymax'])
df.head()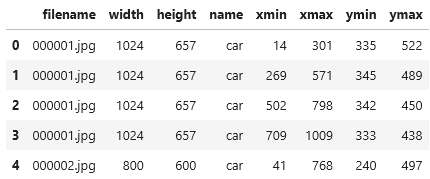
df.shape()
(15663, 8)

df['name'].value_counts()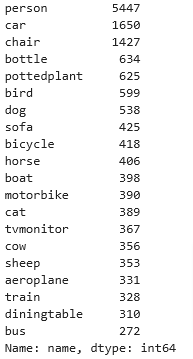
Yolo Boundaries
The bounding box data above cannot be used by Yolo, we need to convert it from
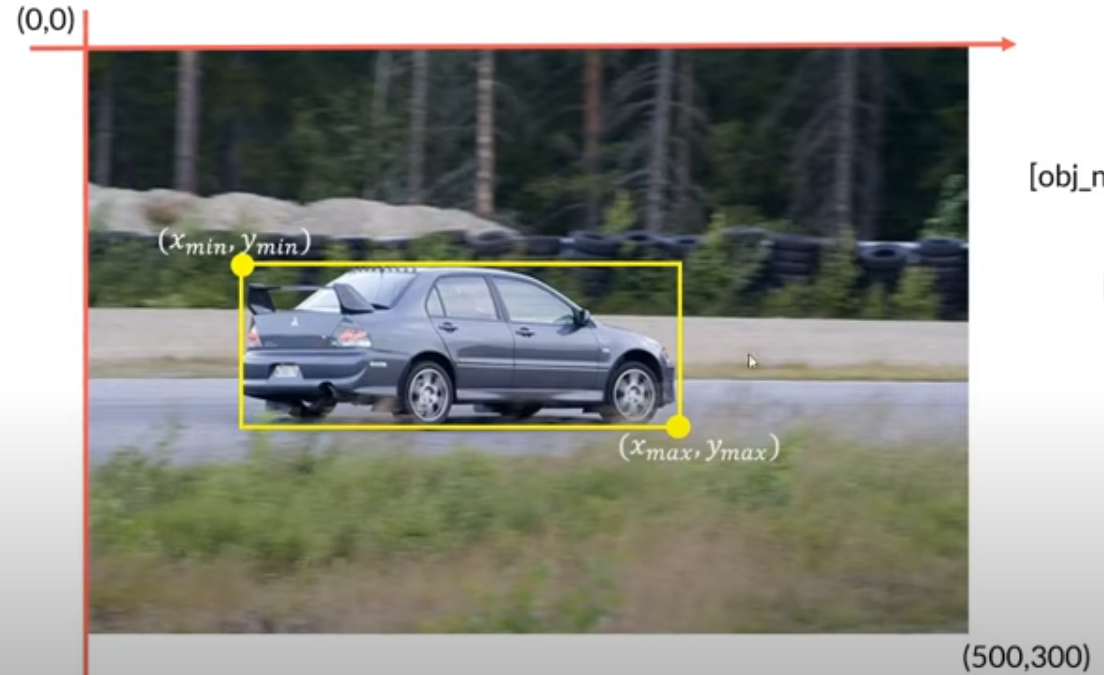
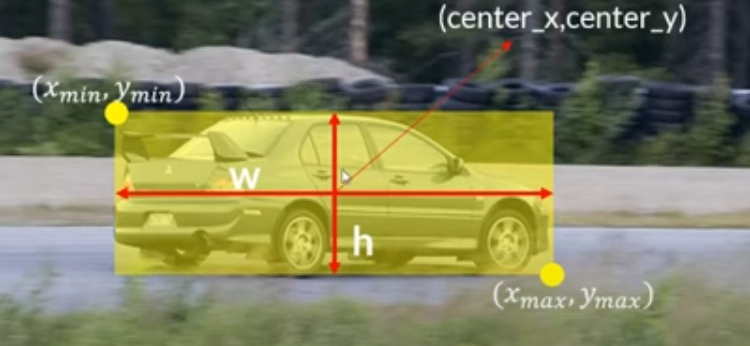
to this:
Convert Types of X,Ys
- We need to convert the Xmin, Xmax…. to center points and width and height
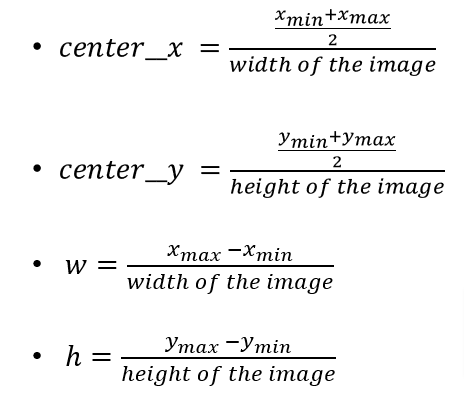
- Before we make our calculations let’s look at the data types
df.info()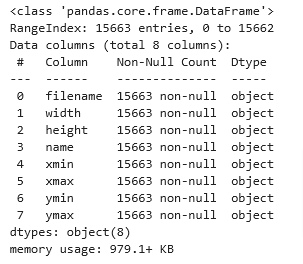
Convert data types
# Data type conversion
cols = ['width','height','xmin','xmax','ymin','ymax']
df[cols] = df[cols].astype(int)
df.info()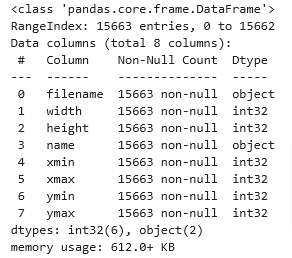
Calculate New Positions
# Use the formulas above to calculate the needed values
# center x, center y
df['center_x'] = ((df['xmax']+df['xmin'])/2)/df['width']
df['center_y'] = ((df['ymax']+df['ymin'])/2)/df['height']
# w
df['w'] = (df['xmax']-df['xmin'])/df['width']
# h
df['h'] = (df['ymax']-df['ymin'])/df['height']

df.head()
Split Data
- In order to train a model we need to split the data into a train and test set
- So let’s see how many unique filenames we have first then
- We’ll split it into an 80/20 train/test split
images = df['filename'].unique()
len(images)

5012

# let's split it  80% train and 20% test
img_df = pd.DataFrame(images,columns=['filename'])
img_train = tuple(img_df.sample(frac=0.8)['filename']) # shuffle and pick 80% of images and convert image string to a tuple

# Extract what remains after the train set into test set
img_test = tuple(img_df.query(f'filename not in {img_train}')['filename']) # take rest 20% images

len(img_train) , len(img_test)
(4010, 1002)

img_train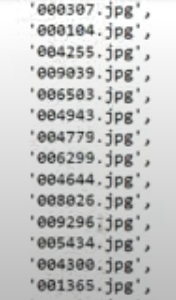
Convert sets into DataFrames
traind_df = df.query(f'filename in {img_train}')
test_df = df.query(f'filename in {img_test}')
Convert Names to ID
We cannot train a model on text data, so the column name in our df is of type object so we need to convert each name type to a code or ID
Assign ID # to Object Names
Function
# label encoding
def label_encoding(x):
    labels = {'person':0, 'car':1, 'chair':2, 'bottle':3, 'pottedplant':4, 'bird':5, 'dog':6,
       'sofa':7, 'bicycle':8, 'horse':9, 'boat':10, 'motorbike':11, 'cat':12, 'tvmonitor':13,
       'cow':14, 'sheep':15, 'aeroplane':16, 'train':17, 'diningtable':18, 'bus':19}
    return labels[x]
Call Function
train_df['id'] = train_df['name'].apply(label_encoding)
test_df['id'] = test_df['name'].apply(label_encoding)

train_df.head()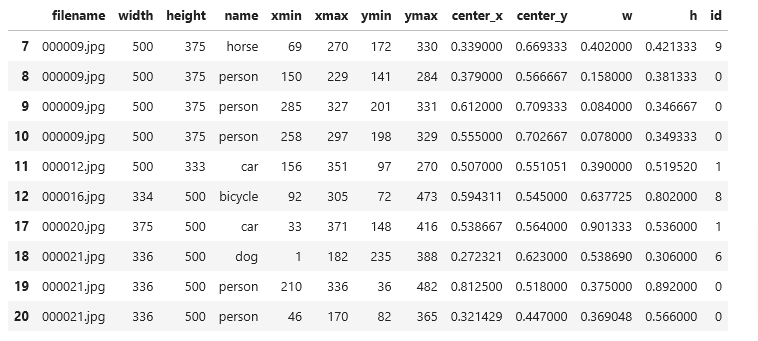
Save Image & Labels in Text file
Setup Files
import os
from shutil import move

# set path to files and create directories
train_folder = 'data_images/train'
test_folder = 'data_images/test'


os.mkdir(train_folder)
os.mkdir(test_folder)

# create the dfs
cols = ['filename','id','center_x','center_y', 'w', 'h']
groupby_obj_train = train_df[cols].groupby('filename')
groupby_obj_test = test_df[cols].groupby('filename')
Save Function
- We need to save the text information for each file in its own filename.txt file
- set_index to filename will rename the new file to the existing “filename”
- Use sep = ” ” instead of the default “,” in csv files
#groupby_obj_train.get_group('000009.jpg').set_index('filename').to_csv('sample.txt',index=False,header=False)
# save each image in train/test folder and respective labels in .txt
def save_data(filename, folder_path, group_obj):
    # move image
    src = os.path.join('data_images',filename)
    dst = os.path.join(folder_path,filename)
    move(src,dst) # move image to the destination folder

    # save the labels
    text_filename = os.path.join(folder_path,
                                 os.path.splitext(filename)[0]+'.txt')
group_obj.get_group(filename).set_index('filename').to_csv(text_filename,sep=' ',index=False,header=False)- Here is a list of the groups in the groupby object
groupby_obj_train.groups
# Let's look at the keys or filenames in this instance
groupby_obj_train.groups.keys
# make a series out of it
filename_series = pd.Series(groupby_obj_train.groups.keys())
filename_series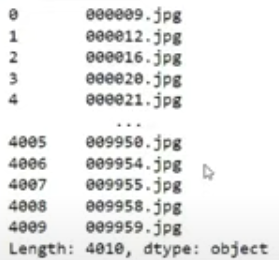 jjj
jjj
# we will use the function save_data with apply which will provide the filename as the first argument (via the apply function)
filename_series.apply(save_data, args=(train_folder, groupby_obj_train))

# do the same for the test files
filename_series_test = pd.Series(groupby_obj_test.groups.keys())
filename_series_test.apply(save_data,args=(test_folder,groupby_obj_test))- Now each image file will have its own .txt file with the data in it like this
- Where the first number is the id of the class name
- And both train and test folders are set with images and bounding boxes and labels

Train Model
Now our data is ready to be used to train and test our model. Follow on “Basic Yolo Training”