# Use code that follows below, this chunk doesn't work well after interrupting
# import ultralytics  this was done already earlier
import cv2
# import cvzone that's professors own package that has alternate ways to draw BBoxes

s = 0  # for default webcam
cap = cv2.VideoCapture(s)
win_name = "YashaYa Feed"
# now we set the width (id =3) and height (id = 4) of the image feed optional
#cap.set(3,1280,)  # or 640
#cap.set(4,720) # and 480Y8 Pretrained Webcam 1
In the previous page we learned the basics of YOLO8 with images, let’s set it up with our webcam. Remember we already learned how to access our webcam earlier in the OpenCV section.
Setup Webacm
Set Feed & Size
- As mentioned above we already accessed the webcam using OpenCV in that section, so let’s import it
- Create a capture instance using cv2.VideoCapture()
.
Display Frames
Here is a newer version of how we did it in OpenCV section
cap = cv2.VideoCapture(0)

while cap.isOpened():
    #Read frame from video
    success, frame = cap.read()
    if success:   #if frame is read successfully
        cv2.imshow("ShaYaSha", frame)
        if cv2.waitKey(1) == 27:
            break   # if user breaks with ESC key

    else:
        break    # if end of video is reached

# Release video capture object and close display window
cap.release()
cv2.destroyAllWindows()
Another Way
cv2.namedWindow(win_name, cv2.WINDOW_NORMAL)

while cv2.waitKey(1) != 27: # Escape
    has_img, img = cap.read()
    if not has_img:
        break
    cv2.imshow(win_name, img)

cap.release()
cv2.destroyWindow(win_name)
Now that we’ve tested the camera and it works perfectly
Insert Model
- Let’s add the model to our feed
- We will use the first chunk of code from above (either will work) to activate the webcam
- Let’s first use the YOLOv8l, remember the commands from the previous page listed below
model = YOLO('../Yolo-Weights/yolov8l.pt')
results = model("images/kids.jpg", show=True)- The difference is we will not be using an image as the input for the model to process, we will use img which is the cap.read() value
- We will not be using show=True to show the resulting image after it has been processed we will use stream = True which forces it to use generators which is more efficient
- The code below inserts the model and feed it the webcam feed for processing. It does not display the results anywhere, it just displays the feed
- The chunk below includes setting up the camera as we did earlier above
# Both of these were satisfied above
# from ultralytics import YOLO
# import cv2

# Set 0 for the ID of the default camera
cap = cv2.VideoCapture(0)
win_name = "YaShaYa"

# Add model to evaluate the video capture
model = YOLO('../Yolo-Weights/yolov8l.pt')

while cap.isOpened():
    #Read frame from video
    success, frame = cap.read()
    if success:   #if frame is read successfully set the results of the model on the frame
        results = model(frame, stream=True)
        cv2.imshow(win_name, frame)
        if cv2.waitKey(1) == 27:
            break   # if user breaks with ESC key

    else:
        break    # if end of video is reached

# Release video capture object and close display window
cap.release()
cv2.destroyAllWindows()
The boxes are saved in results but not shown on camera feed.
Extract Coordinates
- I’ll do it in steps, now that the results are in results
- We loop through the results and assign the boxes for each result to boxes with: boxes = r.boxes with each box being assigned to the value of r
- Then we have to loop through every box in the boxes and display each box in another inner loop
- The inner loop will extract the X,Y & X,Y coordinates for each box. The reason there are two sets is because we want to pull out the upper left corner and the lower right corner in order to plot the bounding box for each class object detected
- Remember there are two ways to plot the boxes, using xyxy or box.xwwh (width, height), whichever method you wish to use is your preference, let’s for now use xyxy because I don’t feel like covering the formula for calculating wh from locations. WIDTH = x2-x1 HEIGHT=y2-y1
- Opencv uses xyxy so we will use that here
- We only want to extract the first element of the box [0]
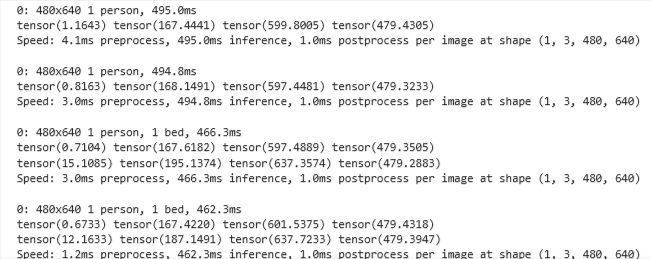
- Let’s do it step by step and just print the values for now before we annotate the boxes with them
for r in results:
        boxes = r.boxes
        for box in boxes:
                x1,y1,x2,y2 = box.xyxy[0]
                # or = box.xywh[0]  if you wish this format
print(x1,y1,x2,y2)- Let’s add this section to the code and preview
from ultralytics import YOLO
import cv2

# Set 0 for the ID of the default camera
cap = cv2.VideoCapture(0)
win_name = "YaShaYa"

# Add model to evaluate the video capture
model = YOLO('../Yolo-Weights/yolov8l.pt')

while cap.isOpened():
    #Read frame from video
    success, frame = cap.read()
    if success:   #if frame is read successfully set the results of the model on the frame
        results = model(frame, stream=True)

        # Insert Box Extraction section here
        for r in results:
        boxes = r.boxes
        for box in boxes:
                x1,y1,x2,y2 = box.xyxy[0]
                print(x1,y1,x2,y2)

        cv2.imshow("ShaYaSha", frame)
        if cv2.waitKey(1) == 27:
            break   # if user breaks with ESC key

    else:
        break    # if end of video is reached

# Release video capture object and close display window
cap.release()
cv2.destroyAllWindows()
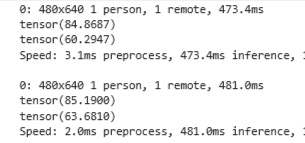
- As you see we are getting multiple detection and coordinates are displayed in the tensor() …. naming
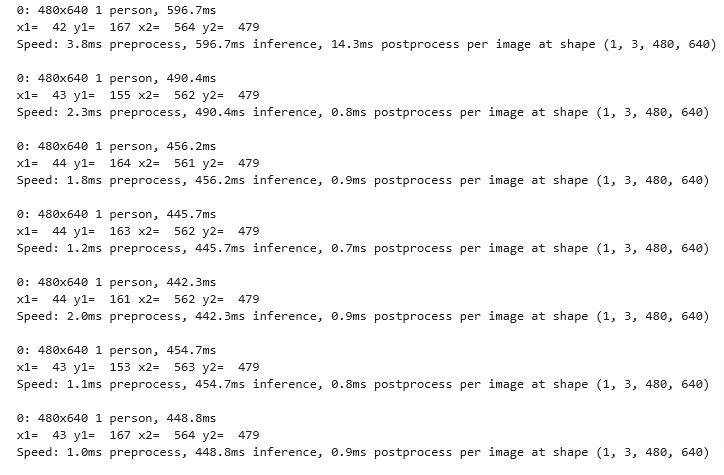
- Let’s convert these values into integers before we print
from ultralytics import YOLO
import cv2

# Set 0 for the ID of the default camera
cap = cv2.VideoCapture(0)
win_name = "YaShaYa"

# Add model to evaluate the video capture
model = YOLO('../Yolo-Weights/yolov8l.pt')

while cap.isOpened():
    #Read frame from video
    success, frame = cap.read()
    if success:   #if frame is read successfully set the results of the model on the frame
        results = model(frame, stream=True)

        # Insert Box Extraction section here
        for r in results:
                boxes = r.boxes
                        for box in boxes:
                                x1,y1,x2,y2 = box.xyxy[0]
                                x1,y1,x2,y2 = int(x1),int(y1),int(x2),int(y2)  # convert values to integers
                                print("x1= ",x1,"y1= ",y1,"x2= ",x2,"y2= ",y2)

        cv2.imshow("ShaYaSha", frame)
        if cv2.waitKey(1) == 27:
            break   # if user breaks with ESC key

    else:
        break    # if end of video is reached

# Release video capture object and close display window
cap.release()
cv2.destroyAllWindows()
OpenCV
Display BB
We covered the rectangle function in OpenCV, here is the syntax for cv2.rectangle()
img = cv2.rectangle(img, pt1, pt2, color[, thickness[, lineType[, shift]]])- So to draw the rectangles we just insert this line of code
- Frame is the input image
- pt1 & pt2 are the two points of the rectangle, and since we have two for each we use a list() for each
- Let’s make the color green (0,255,0)
- Update the code
- Preview: and we can see that it does what we are asking it to do, which is to detect objects. We haven’t asked it to specify classes yet.
cv2.rectangle(frame, (x1,y1), (x2,y2), (0,255,0), 3)- If you wish to use the imported function here is the code, it is found in cvzone/Utils.py
def cornerRect(img, bbox, l=30, t=5, rt=1,
               colorR=(255, 0, 255), colorC=(0, 255, 0)):
    """
    :param img: Image to draw on.
    :param bbox: Bounding box [x, y, w, h]
    :param l: length of the corner line
    :param t: thickness of the corner line
    :param rt: thickness of the rectangle
    :param colorR: Color of the Rectangle
    :param colorC: Color of the Corners
    :return:
    """
    x, y, w, h = bbox
    x1, y1 = x + w, y + h
    if rt != 0:
        cv2.rectangle(img, bbox, colorR, rt)
    # Top Left  x,y
    cv2.line(img, (x, y), (x + l, y), colorC, t)
    cv2.line(img, (x, y), (x, y + l), colorC, t)
    # Top Right  x1,y
    cv2.line(img, (x1, y), (x1 - l, y), colorC, t)
    cv2.line(img, (x1, y), (x1, y + l), colorC, t)
    # Bottom Left  x,y1
    cv2.line(img, (x, y1), (x + l, y1), colorC, t)
    cv2.line(img, (x, y1), (x, y1 - l), colorC, t)
    # Bottom Right  x1,y1
    cv2.line(img, (x1, y1), (x1 - l, y1), colorC, t)
    cv2.line(img, (x1, y1), (x1, y1 - l), colorC, t)

    return img
from ultralytics import YOLO
import cv2
# Set 0 for the ID of the default camera
cap = cv2.VideoCapture(0)
win_name = "YaShaYa"
# Add model to evaluate the video capture
model = YOLO('../Yolo-Weights/yolov8l.pt')
while cap.isOpened():
#Read frame from video
success, frame = cap.read()
if success: #if frame is read successfully set the results of the model on the frame
results = model(frame, stream=True)
# Insert Box Extraction section here
for r in results:
boxes = r.boxes
for box in boxes:
x1,y1,x2,y2 = box.xyxy[0]
x1,y1,x2,y2 = int(x1),int(y1),int(x2),int(y2) # convert values to integers
cv2.rectangle(frame, (x1,y1), (x2,y2), (0,255,0), 3)
# we can also use a function from cvzone/utils.py called
#cvzone.cornerRect(frame,(x1,y1,w,h))
# or if we want to include the code from above use
# cornerRect(frame,(x1,y1,w,h))
cv2.imshow("ShaYaSha", frame)
if cv2.waitKey(1) == 27:
break # if user breaks with ESC key
else:
break # if end of video is reached
# Release video capture object and close display window
cap.release()
cv2.destroyAllWindows()Display Conf
- To display the confidence of each box we simply assign box.conf[0] to a variable: conf
- The value is not rounded and let’s fix it so we can get a number that indicates %, and since we want to round it to 2 decimal places we multiply and divide by 100
- math.ceil() returns the smallest integer greater than or equal to a given number
Syntax
box.conf[0]
from ultralytics import YOLO
import cv2
import math

# Set 0 for the ID of the default camera
cap = cv2.VideoCapture(0)

# Add model to evaluate the video capture
model = YOLO('../Yolo-Weights/yolov8l.pt')

while cap.isOpened():
    #Read frame from video
    success, frame = cap.read()
    if success:   #if frame is read successfully set the results of the model on the frame
        results = model(frame, stream=True)

        # Insert Box Extraction section here
        for r in results:
                boxes = r.boxes
                for box in boxes:
                        x1,y1,x2,y2 = box.xyxy[0]
                        x1,y1,x2,y2 = int(x1),int(y1),int(x2),int(y2)  # convert values to integers
                        cv2.rectangle(frame, (x1,y1), (x2,y2), (0,255,0), 3)

                        conf = math.ceil(box.conf[0]*100)/100
                        print(conf)

        cv2.imshow("ShaYaSha", frame)
        if cv2.waitKey(1) == 27:
            break   # if user breaks with ESC key

    else:
        break    # if end of video is reached

# Release video capture object and close display window
cap.release()
cv2.destroyAllWindows()
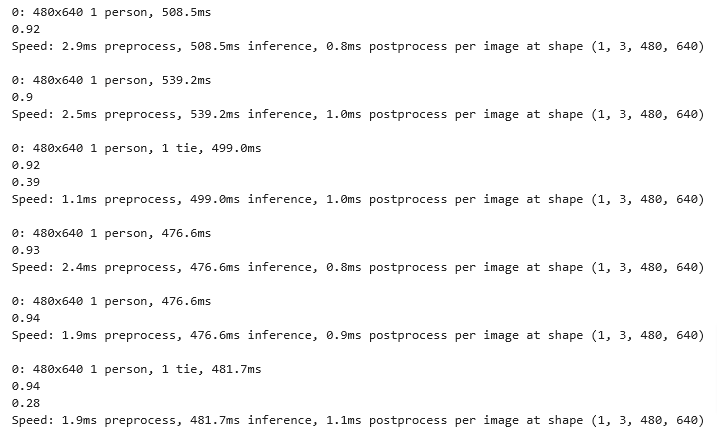
- As you see we are getting 0.8748 so if you want to show % multiply by 100 and you’d read: 87.48

- Now we need to round to 2 we can use the math ceil function which rounds up to the nearest integer
- Multiply X 100 which shifts the decimal two places to the right -> so 0.8743 would give us 87.43
- Apply the math.ceil() to round up to the nearest integer -> 87
- If we want confidence in decimals we divide the rounded value by 100 to give us the two decimals -> 0.87
- It’s kind of a round about way to using round(x,2) but the built-in round() function doesn’t work with tenserflow
Plot BB & Conf
- In order to display the BB and Confidence number on the feed image we just use one of the functions in cvzone package.
- The issue with using OpenCV is it will place a rectangle and then place the text on top of the rectangle but the text will not be centered in the rectangle
- So let’s use cvzone.putTextRect()
- putTextRect(frame, f’{}, x,y, scale =0.7, thickness=1) scale and thickness are optional if you want to edit the defaults which are 3 & 3
- The issue with the position is the box will keep moving if the object keeps moving up on the screen and at a point the text box will be outside the displayed image.
- So we have to limit how far the text box will go on the screen before it is capped and not allowed to drift off the visible image
- We set the max values for both x and y with y being set to being at y=35 as max value
def putTextRect(img, text, pos, scale=3, thickness=3, colorT=(255, 255, 255),
                colorR=(255, 0, 255), font=cv2.FONT_HERSHEY_PLAIN,
                offset=10, border=None, colorB=(0, 255, 0)):
    """
    Creates Text with Rectangle Background
    :param img: Image to put text rect on
    :param text: Text inside the rect
    :param pos: Starting position of the rect x1,y1
    :param scale: Scale of the text
    :param thickness: Thickness of the text
    :param colorT: Color of the Text
    :param colorR: Color of the Rectangle
    :param font: Font used. Must be cv2.FONT....
    :param offset: Clearance around the text
    :param border: Outline around the rect
    :param colorB: Color of the outline
    :return: image, rect (x1,y1,x2,y2)
    """
    ox, oy = pos
    (w, h), _ = cv2.getTextSize(text, font, scale, thickness)

    x1, y1, x2, y2 = ox - offset, oy + offset, ox + w + offset, oy - h - offset

    cv2.rectangle(img, (x1, y1), (x2, y2), colorR, cv2.FILLED)
    if border is not None:
        cv2.rectangle(img, (x1, y1), (x2, y2), colorB, border)
    cv2.putText(img, text, (ox, oy), font, scale, colorT, thickness)

    return img, [x1, y2, x2, y1]
#from ultralytics import YOLO
#import cv2
import math
# Set 0 for the ID of the default camera
cap = cv2.VideoCapture(0)
win_name = "YaShaYa"
# Add model to evaluate the video capture
model = YOLO('../Yolo-Weights/yolov8l.pt')
while cap.isOpened():
#Read frame from video
success, frame = cap.read()
if success: #if frame is read successfully set the results of the model on the frame
results = model(frame, stream=True)
# Insert Box Extraction section here
for r in results:
boxes = r.boxes
for box in boxes:
x1,y1,x2,y2 = box.xyxy[0]
x1,y1,x2,y2 = int(x1),int(y1),int(x2),int(y2) # convert values to integers
cv2.rectangle(frame, (x1,y1), (x2,y2), (0,255,0), 3)
# we can also use a function from cvzone/utils.py called
#cvzone.cornerRect(img,(x1,y1,w,h))
conf = math.ceil(box.conf[0]*100)/100
#print(conf)
putTextRect(frame,f'{conf}',(max(0,x1), max(35,y1)))
cv2.imshow(win_name, frame)
if cv2.waitKey(1) == 27:
break # if user breaks with ESC key
else:
break # if end of video is reached
# Release video capture object and close display window
cap.release()
cv2.destroyAllWindows()Plot Class
- So in order to display the class for each object detected we need to provide it with a list of possible classes to choose from
- Let’s provide a list of class names and call it classNames
- We need to provide the ID number of each class in the list, because the model will not display a name but will display an ID
- Since class is a reserved word we will use a variable name: cls toextract the ID
- So far it will display the classID right after the confidence level which displays it as a float
putTextRect(frame,f'{conf} {cls}',(max(0,x1), max(35,y1)))- So let’s convert from float to integer and then assign the ID to the list of classes classNames
cls = int(box.cls[0])- classNames[cls] this will extract the class label associated to the ID
#from ultralytics import YOLO
#import cv2
#import math

# Set 0 for the ID of the default camera
cap = cv2.VideoCapture(0)
win_name = "YaShaYa"

# Add model to evaluate the video capture
model = YOLO('../Yolo-Weights/yolov8l.pt')

# List of Class names
classNames = ["person", "bicycle", "car", "motorbike", "aeroplane", "bus", "train", "truck", "boat",
              "traffic light", "fire hydrant", "stop sign", "parking meter", "bench", "bird", "cat",
              "dog", "horse", "sheep", "cow", "elephant", "bear", "zebra", "giraffe", "backpack", "umbrella",
              "handbag", "tie", "suitcase", "frisbee", "skis", "snowboard", "sports ball", "kite", "baseball bat",
              "baseball glove", "skateboard", "surfboard", "tennis racket", "bottle", "wine glass", "cup",
              "fork", "knife", "spoon", "bowl", "banana", "apple", "sandwich", "orange", "broccoli",
              "carrot", "hot dog", "pizza", "donut", "cake", "chair", "sofa", "pottedplant", "bed",
              "diningtable", "toilet", "tvmonitor", "laptop", "mouse", "remote", "keyboard", "cell phone",
              "microwave", "oven", "toaster", "sink", "refrigerator", "book", "clock", "vase", "scissors",
              "teddy bear", "hair drier", "toothbrush"
              ]

while cap.isOpened():
    #Read frame from video
    success, frame = cap.read()
    if success:   #if frame is read successfully set the results of the model on the frame
        results = model(frame, stream=True)

        # Insert Box Extraction section here
        for r in results:
                boxes = r.boxes
                for box in boxes:
                        x1,y1,x2,y2 = box.xyxy[0]
                        x1,y1,x2,y2 = int(x1),int(y1),int(x2),int(y2)  # convert values to integers
                        cv2.rectangle(frame, (x1,y1), (x2,y2), (0,255,0), 3)
                        # we can also use a function from cvzone/utils.py called
                        #cvzone.cornerRect(img,(x1,y1,w,h))

                        # extract the confidence level
                        conf = math.ceil(box.conf[0]*100)/100


                        # extract class ID
                        cls = int(box.cls[0])

                        # display both conf & class ID on frame
                        putTextRect(frame,f'{conf} {classNames[cls]}',(max(0,x1), max(35,y1)))
                        # To edit the size & thickness of text use
                        #putTextRect(frame,f'{classNames[cls]} {conf}',(max(0, x1),max(35,y1)), scale = 2, thickness=1)

        cv2.imshow(win_name, frame)
        if cv2.waitKey(1) == 27:
            break   # if user breaks with ESC key

    else:
        break    # if end of video is reached

# Release video capture object and close display window
cap.release()
cv2.destroyAllWindows()
Y8 Built-In
Display BB
- If we wish to use the built-in functions all we need are these two lines
        # visusalize the results on the frame
        annotated_frame = results[0].plot()

        # display the annotated frame
cv2.imshow("ShaYaSha", annotated_frame)- As you see we have omitted the lines that draw the boxes, the loop to extract the xy, the loop to display the confidence levels
- The code above does all that automatically
from ultralytics import YOLO
import cv2
import math

# Set 0 for the ID of the default camera
cap = cv2.VideoCapture(0)

# Add model to evaluate the video capture
model = YOLO('../Yolo-Weights/yolov8l.pt')

while cap.isOpened():
    #Read frame from video
    success, frame = cap.read()
    if success:   #if frame is read successfully set the results of the model on the frame
        results = model(frame)

        # visusalize the results on the frame
        annotated_frame = results[0].plot()

        # display the annotated frame
        cv2.imshow("ShaYaSha", annotated_frame)

        if cv2.waitKey(1) == 27:
            break   # if user breaks with ESC key

    else:
        break    # if end of video is reached

# Release video capture object and close display window
cap.release()
cv2.destroyAllWindows()
CVZone Package
- If we want to download cvzone package and use it so we can manually control the process follow this:
pip install cvzone
~\AI\computer_vision\od_projects\currentdirectory>venv\Scripts\activate

(venv) ~\AI\computer_vision\od_projects\currentdirectory>pip install cvzone- Let’s go back to the code
- Import cvzone
- use cvzone.putTextRect(image, text to print (we’ll be using a variable so we’ll use f’{}’
- Then we give it the position x,y, but since we don’t want it on the exact corner height wise, let’s take it above the y value (y-20) instead of y, remember the starting point of x1,y1 is the upper left corner, so -y1 means above the upper corner which would be above the box
- You probably can see the issue here where the object is moved all the way to the top of the screen, then the annotation will be invisible since it will be way above the screen and invisible
- So we need to limit the max value we can go up, or cap it. We can use the max value of x1, y1 like this
- max(0,x1) or max (0,y1) -> what we are telling it is we want to use the max value of the two, if 0 is the max then use it, and if y1-20 is the max then use it, this way the display box will always be visible as it will never go above the y1=0 or x1=0 limits
from ultralytics import YOLO
import cv2
import math
import cvzone

# Set 0 for the ID of the default camera
cap = cv2.VideoCapture(0)

# Add model to evaluate the video capture
model = YOLO('../Yolo-Weights/yolov8l.pt')

while cap.isOpened():
    #Read frame from video
    success, frame = cap.read()
    if success:   #if frame is read successfully set the results of the model on the frame
        results = model(frame, stream=True)

        # Insert Box Extraction section here
        for r in results:
                boxes = r.boxes
                for box in boxes:
                        x1,y1,x2,y2 = box.xyxy[0]
                        x1,y1,x2,y2 = int(x1),int(y1),int(x2),int(y2)  # convert values to integers
                        cv2.rectangle(frame, (x1,y1), (x2,y2), (0,255,0), 3)

                        conf = math.ceil(box.conf[0]*100)/100
                        cvzone.putTextRect(frame,f'{conf}',(max(0, x1),max(35,y1)))

        cv2.imshow("ShaYaSha", frame)
        if cv2.waitKey(1) == 27:
            break   # if user breaks with ESC key

    else:
        break    # if end of video is reached

# Release video capture object and close display window
cap.release()
cv2.destroyAllWindows()